ATW (Accessible Through Wire) Wire Installation Instructions
![]() Download: ATW (Accessible Through Wire) Wire Installation Instructions (PDF)
Download: ATW (Accessible Through Wire) Wire Installation Instructions (PDF)
1. With the cover plates removed, feed the wires through the openings in each of the hinge
leaves.
- Note: A 3/4"19.05 mm clearance hole is required in the door and frame for the ATW wires.
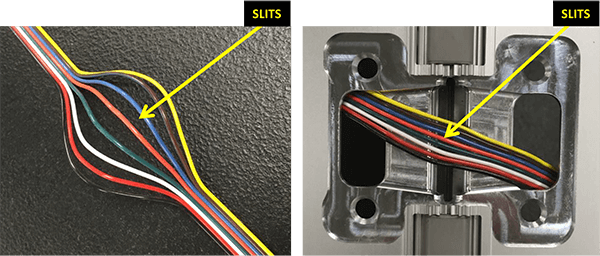
- Note: At the center of the ribbon wire, the individual wires are separated. Center these
separations (slits) across the middle of the hinge. - Position the wires so they enter the openings at opposite ends of the pockets, one must
be high and one must be low.
2. Using the side of a cover plate, gently push the wires to the floor of the cap between the
hinge leaves.
- Note that there is adhesive below the wires, do not press the wires into the adhesive
until the next step.
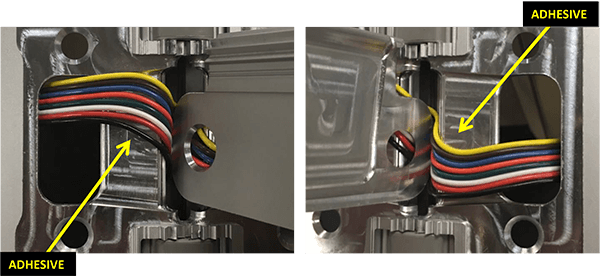
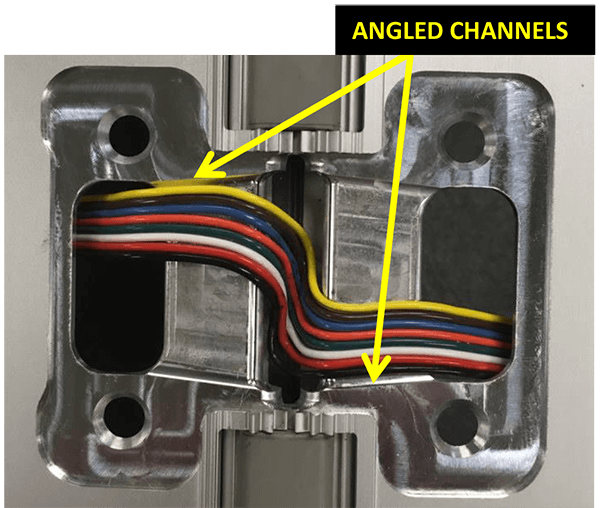
3. While holding the cover plate against the wires keeping them to the floor of the cap, straighten the
wires out so they follow the sides of the angle channels as close as possible. Press the wires into the
adhesive and remove the cover plate to inspect the installation. Check for the following:
- The wires have stayed in sequence so none of them are crossing.
- The wires are fully contained inside the angled channels.
- The transition from high to low is as prominent as possible.
- The wires nearly reach the bottom of the pocket between the hinge leaves.
4. Install the cover plates, they must be installed in the correct order.
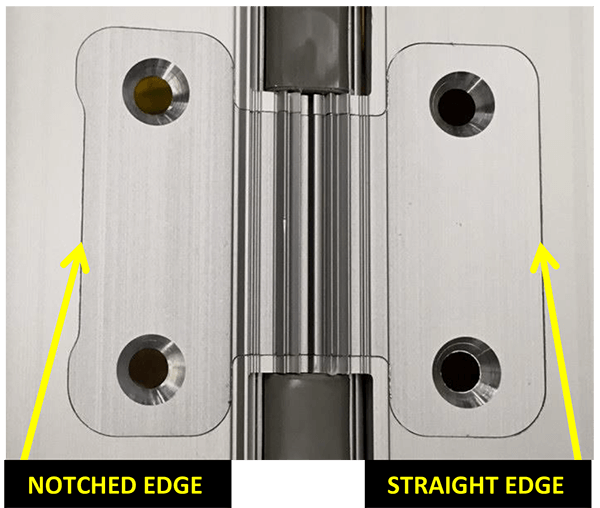
- The 2 panels (cover plates) are unique, one has a straight edge and one has a notched edge.
The panel with the straight edge must be installed first. - The cover plates should lay completely flat with the surfaces of the hinge. If they do not lay
flat, remove the cover plates and inspect the wires to make sure nothing has shifted.
