 Jim Handschuh is president/owner of Doorwares Associates, Inc. located in Green Lane, PA. His father John founded the company in 1983 and Jim began learning the business from the ground up in 1988. He is a Certified Institutional Locksmith and is among SELECT Hinges original representatives. As one of our most experienced installers, we asked Jim to share his tips to help make your job faster and easier.
Aaron McElrath has been the Eastern Regional Sales Manager for SELECT Hinges since 2014. He assists 10 different sales agencies covering 28 states. Learn more>>
While Jim’s and Aaron’s tips are written for retrofitting a door with an SL57 Full Surface Geared Continuous Hinge, many of the tips are applicable for new installations of other SELECT geared continuous hinge models. Read on – your day will go much smoother!
BEFORE ESTIMATING THE RETROFIT JOB
1. Survey the job site and determine your needs to complete the job.
This will save you time by ensuring that you have the tools and materials you need onsite when you start the job.
- Evaluate the condition of all the components such as the door closer, the locking hardware, the frame, the door itself, the threshold, etc. If you discover the threshold needs replacing due to a dragging door, you may need different tools and supplies to complete the work.
- If you will be replacing worn-out butt hinges, see if the hinge screws look rusty. Spray each of them with some PB B’laster® Penetrant or WD-40® Multi-Use Product, etc., the day you are surveying the job site. This will give the screws time to soak before you return. You will thank yourself later if you get the job.
- If it's an exterior door, don’t forget to check the condition of the weather stripping, drip edge guards, as well as door sweeps. When you "fix" the door problem, your customer will likely scrutinize your repair. So recommend the replacement of any component as part of the entire job to ensure the longevity of the doors and the customer’s satisfaction.
- When presenting the estimate, remind your customer that the new SELECT hinge will last forever and comes with the industry’s only Continuous WarrantyTM. Independent tests proved that SELECT hinges can outlast 25 million open-close cycles or 60+ years. These hinges will still be working long after the customer retires!
BEFORE YOU START RETROFITTING AN EXISTING DOOR
2. Stock your toolbox and truck
Quality tools and supplies are critical to creating customer satisfaction and repeat business. The installation will go much easier for you, too!
- Hinge pocket filler plates in the proper frame color. Butt hinges have recesses in the door. This steel plate fills the recess before you add the SELECT hinge.
- Metal hacksaw or power cutting tool; SELECT hinges are easy to cut.
- Tape measurer
- Drill
- Impact screwdrivers to increase your ability to loosen rusted tight screws.
- Small cutoff tools and Dremel® tools with sharp bits. These are very important when butt hinges and strike locations must be modified or cut off.
- Charged batteries for cordless tools
 Caulk in the proper color to fill cracks, seal thresholds, etc.
- SELECT HB375 Drill Bit. This self-centering, through-bolt drill bit speeds installation. It eliminates the need for a center punch and forms the .375 holes you need to install your SL57 effortlessly. Make sure it is still sharp.
 SELECT Pivot Hole Covers. When replacing a building's pivot hinges, this is a quick and easy solution to cover the holes left by the removed pivot hinges or preps. It applies with a self-adhesive backing and comes in two colors to match your clear or dark bronze frames. Once installed, these covers instantly improve the appearance of the door and frame and block water, grime, bees, wasps and insects from entering the exposed holes.
 - SELECT UHMW Shim Stock. The 100-foot roll is translucent and blends in with the door and frame. Bring the size that fits your project: 1/32" × 1/2", 1/32" × 1-1/2", 1/16" × 1/2" or 1/16" × 1-1/2".
- Paint sticks or quarters. These also can be used to shim the proper spacing between the door and the frame. You can simply tape the quarters to the frame to get the proper spacing.
- Sawhorse or improvisation
- Door jack. This is a fantastic tool that slips underneath the bottom of the door and lifts the door when you step on it.
- Impact screwdrivers to increase your ability to loosen rusted tight screws.
- Broom
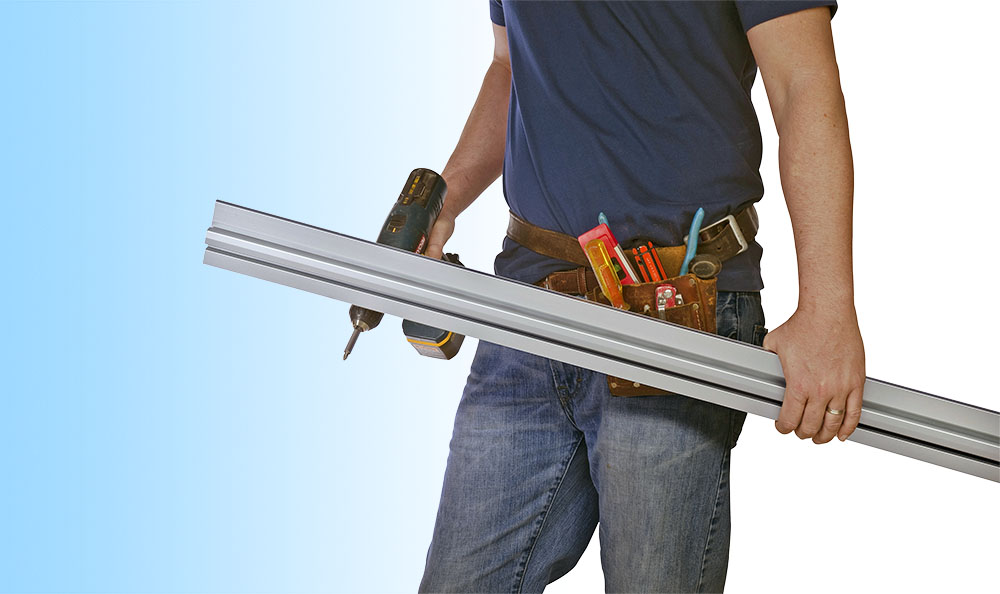
- SL57 full surface geared continuous hinge(s)
BEGIN INSTALLATION
3. Lay the box down and tear it open so it is a flat piece of cardboard. You can then lay the edge of the door in it to protect the door from being scratched. Remove the hinge and fasteners.
4. If the hinge needs to be cut, lay the hinge with the cut side facing down to the ground. Always cut from the bottom. If the cut is above the hinge’s set bearing, slide the bearing cap off above the cut. Remove the bearing, make the cut, replace the bearing and the cap. Do not forget to cut the door leaf cover as well.
5. Use caution when removing or replacing the glass doors. If only one person is doing the installation, remember glass doors are very heavy and there is a chance they will break if you drop them. Remove them slowly and lay them on the ground carefully. Lift and replace them with caution as well.
6. Installation steps for doors with butt hinges:
- Remove the door.
- Take off the old hinges.
- Replace the door. Shim it with SELECT UHMW Shim Stock and install the SELECT hinge. Set the frame leaf first then use two starter screws in the door. Be certain to check that the door swings properly and is adjusted with the proper gaps. Once satisfied, drill the through bolts through the door.
7. Installation steps for doors with offset pivot hinges. Do NOT REMOVE the door.
- Shim the door using SELECT UHMW Shim Stock.
- Install the SELECT continuous geared hinge. Set the frame leaf first then use two starter screws in the door. Be certain to check that the door swings properly and is adjusted with the proper gaps. Once satisfied, drill the through bolts through the door.
- Remove the offset pivot hinges.
- Cover holes with the proper color (clear or dark bronze) SELECT pivot hole covers.
8. Recheck the door swing and closure for proper operation.
9. Remove trash and broom clean the site when the job is complete.
10. Review the installation with the building owner to get their approval and ensure satisfaction.
WATCH THIS STEP-BY-STEP INSTALLATION VIDEO ONSITE
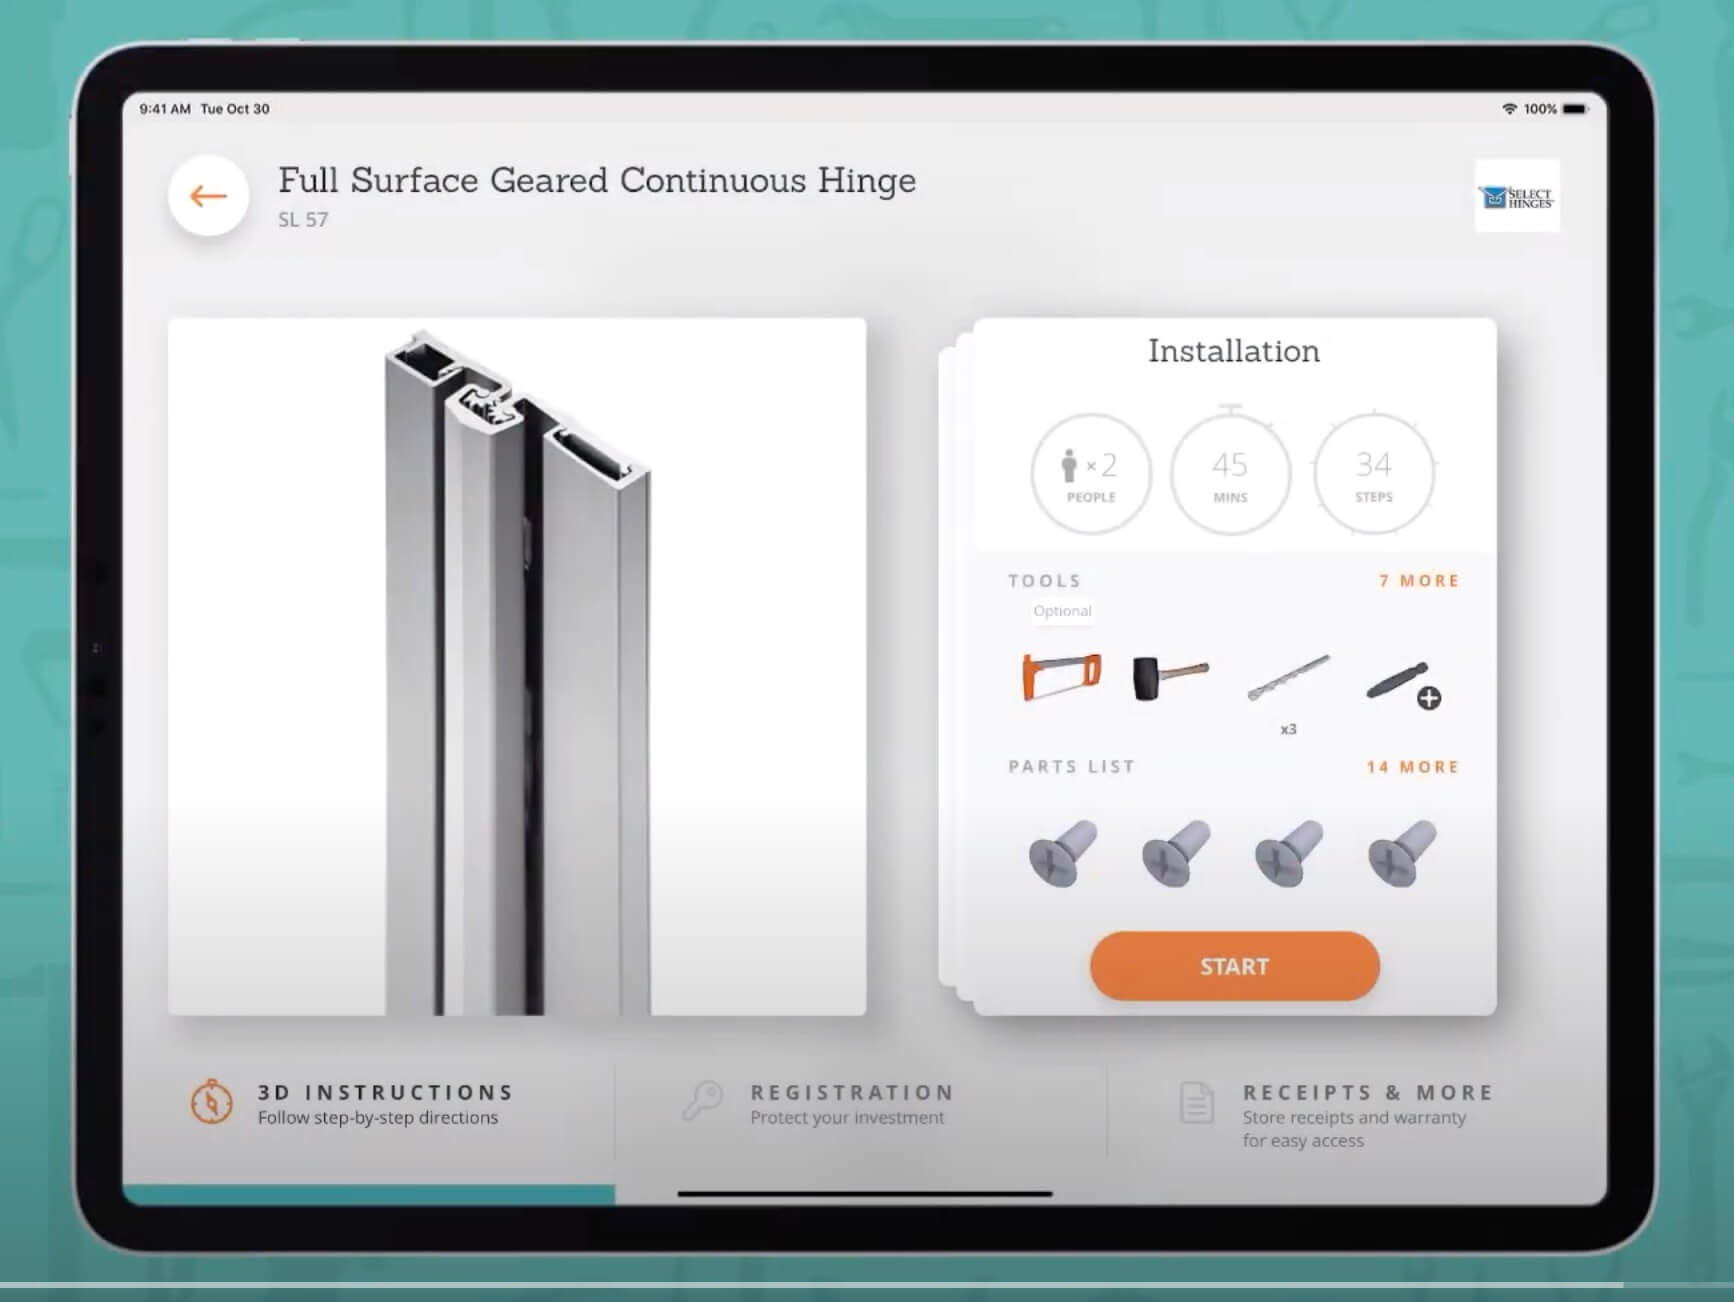 You can also watch a BILT SL57 installation video on your mobile device. It is available in English, French and Spanish. You can pause the video so you can easily step through the installation or re-look at steps as needed.
Download the BILT app here. Then use the QR code included in the hinge packaging or search the app for the SL57 instructions in your preferred language.
Downloadable pdfs in each language are also available here.
SL57 English SL57 Français SL57 Español
IF YOU HAVE INSTALLATION QUESTIONS OR NEED MORE INFORMATION, PLEASE CALL SELECT HINGES AT 800-585-1019